|
|
|
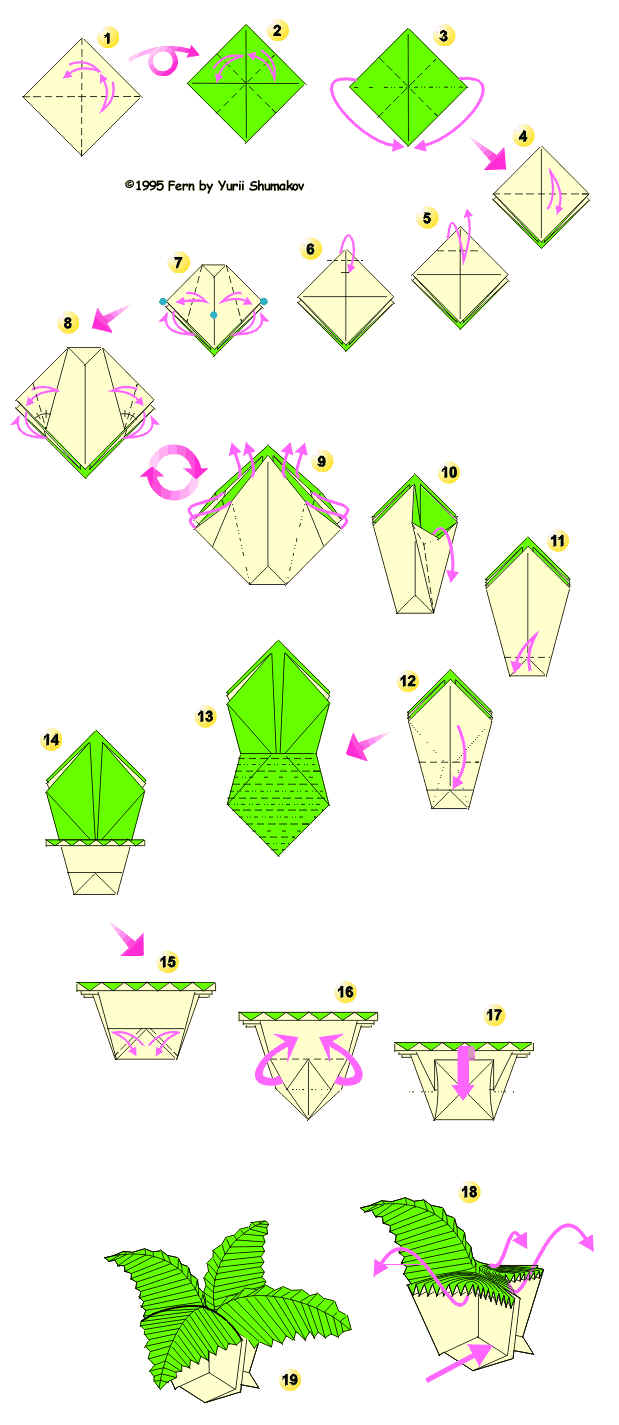
| FERN |
| Use a square of paper. 1 Valley fold the opposite corners together in turn to mark the diagonal fold-lines, and open them up. 2 Turn the model over. Valley fold the opposite sides and edges together and open them up. 3 Move together lateral corners, simultaneously approaching the top corner to bottom. 4 Valley fold the model in half. 5 Valley fold the top point making fold-mark to meet the center of the model. 6 Valley fold the top point to meet the crossing of middle vertical line and fold-mark made in previous step. 7 Valley fold and unfold the left- and right-hand points to meet the vertical middle line as shown. Repeat behind. 8 Valley fold the bottom the left- and right-hand corners over to meet the adjacent fold-lines made in previous step. Repeat behind. Turn the model around. 9 Inside reverse fold the left- and right-hand points inside on the specified lines. |
 |
10
Lower the top edge up, to make a tent-like valley fold on the fold-line made in step 8.
Repeat this action for other three flaps. 11 Valley fold and unfold the bottom edge over the top corner of front triangular flap. 12 Valley fold the top layer, being guided on internal layers marked by an invisible line. 13 Make the pleating of the front layer, by dividing previously it on 2, 4, 8 and 16 parts. 14 Repeat this
operation for other three leaves. Fern is ready! |